
Monday, June 10, 2013
final
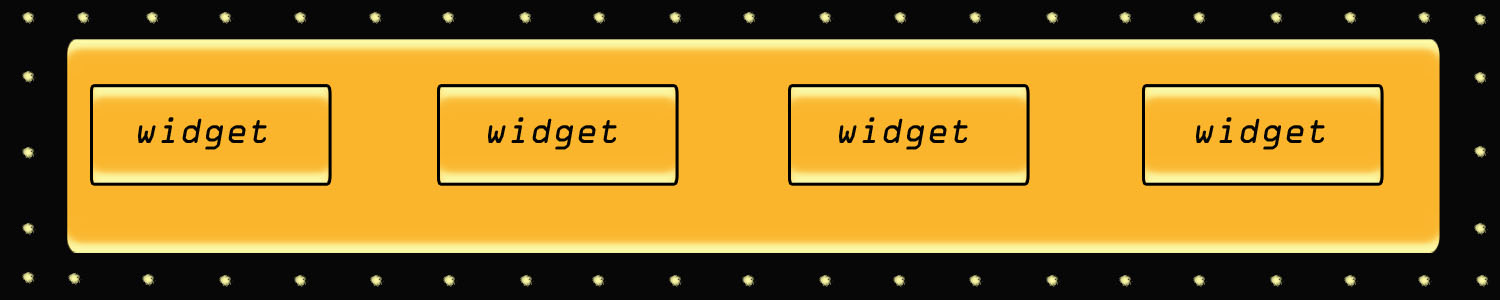
- -To start, create a new photo shop document with
the dimensions of 10 inches wide and 2 inches tall at 150 resolution.
-
-First start with a simple black background so we
can work with any colors later on.
-
-Then create a rounded rectangle using your
rounded rectangle tool, that is 1.5 inches high and 9.5 inches wide.
-
-Use the color “fbf8a5” and fill your rounded
rectangle in with the paint bucket tool.
- -
Then go to blending options, the satin section,
and fill in the color box with “fea407.” Make the opacity 75% and angle 90
degrees. Distance should be set to 11 pixels and size should be 14 pixels.
-
-Then with the remaining black on the outside of the rounded rectangle,
use a paint brush with 21 pixels in size and put dots along the edges about a
half an inch apart from each other. Use the color “f6f3a2.”
-
-After the dots along the outside and main
rounded rectangle are in place, duplicate the exact rounded rectangle from
earlier and shrink it to about a half an inch high and an inch wide to use for
the navigation bar buttons.
-
-Once you diminish the rounded rectangles size go
to blending options and add on a stroke around the outside so you will have an
outline on top of the original rounded rectangle. Use a black stroke with 3%
pixels so there is a thin line outside the navigation bar buttons.
-Duplicate 4 of these rounded rectangles and make
them your buttons, separate them about an inch apart from each other and fill
in the necessary words for your website
Subscribe to:
Comments (Atom)